Counter-Strike:Global Offensive is considered one of the most detailed shooters in terms of mechanics and physics. It has quite a few options that allow the player to customize the game for themselves. This article will focus on the config and Autoexec files. We will tell you what these files are for, how they differ, and how to edit them.
In article you will find:
What Is A CS:GO Config and Autoexec?
Config (or cfg) is the root configuration file of the game, which is located directly in the folder with the game itself. That is, it’s a collection of all current game settings in one file. Your CS:GO config can be replaced with the configs of other players, such as professional players. Thus, by replacing files, you can change all the main settings of the game in one click.
When you run the game, the system will automatically apply the default settings from config.cfg. In any case, you will have the ability to customize the game as you want. You can add your custom commands to config.cfg. But the problem is that, if you want to go back to the default settings, you won’t be able to because you changed them in the file used for the default settings.
And here, autoexec.cfg comes to the rescue. Having created autoexec.cfg, you still have config.cfg. Each time you start the game, your custom settings are launched. If you want to return to the default ones, they are always in your hand.
Since that is resolved, the next question is how to create an Autoexec file.
How to Make an Autoexec for CS:GO?
Create the text document in the game config folder at Program Files (or Local Disc C:) \ Steam \ userdata \ “your Steam ID” \ 730 \ local \ cfg. Open your config.cfg file and copy its contents. Paste all copied text into a recently created file, save it, and rename the file type from autoexec.txt to autoexec.cfg. You have done most of the work. Now, the only thing remaining is to run this file.
How to Run Autoexec in CS:GO
In order for your autoexec file to start working, it must be placed in the game folder. For your convenience, we recommend moving it to the cfg folder.
By default, its location: Program Files (or Local Disc C:) \ Steam \ userdata \ “your Steam ID” \ 730 \ local \ cfg
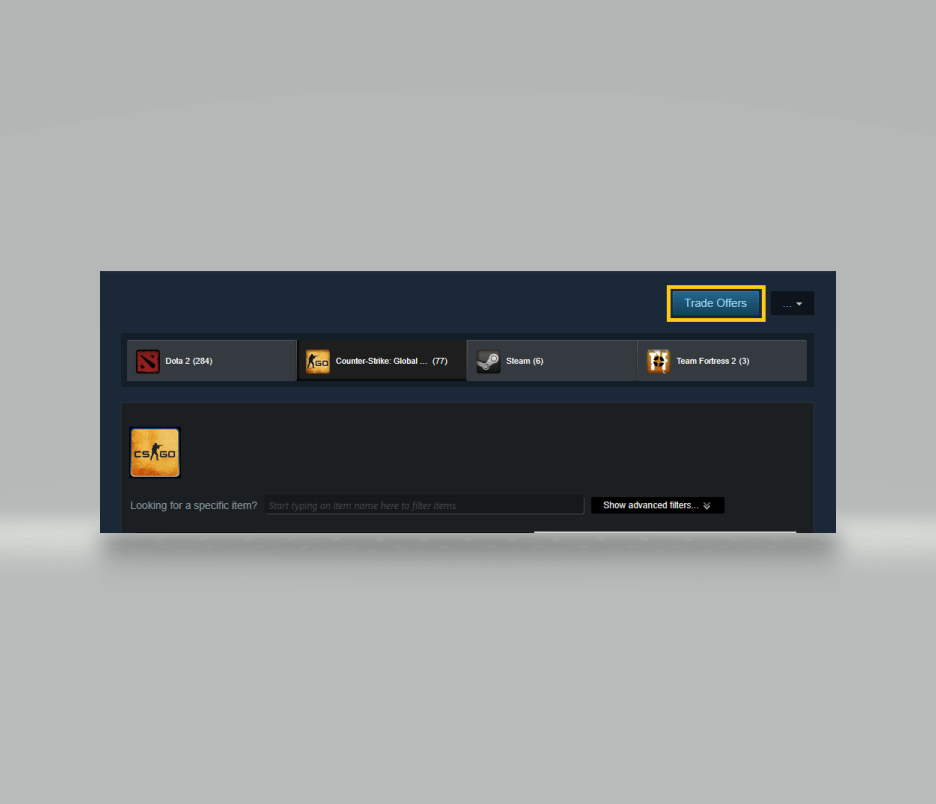
Don’t know your Steam ID? To find it, you need to open Steam and go to your inventory. Then click on Trade Offers.
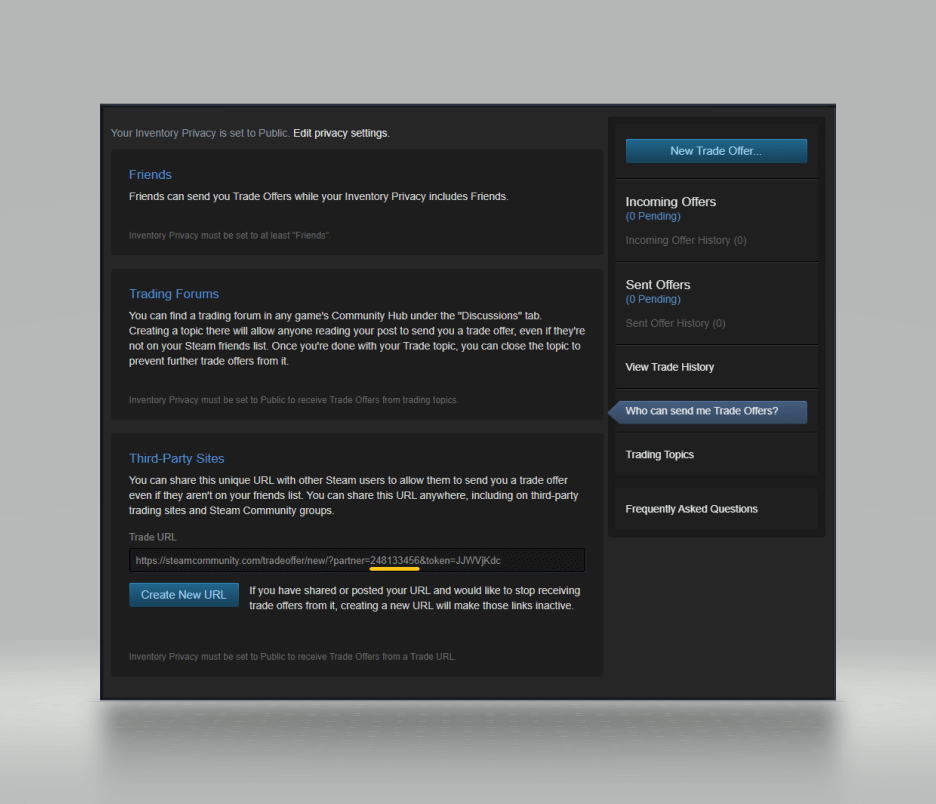
Next, click on the button: Who can send me Trade Offers? Scroll down to the “Third-Party Sites” section. The numbers after partner=….. are your Steam ID.
If you did everything right, there shouldn’t be any problems.
What To Do If Your Autoexec Won’t Load On Startup?
First, check if the file name and its type are correct (should be autoexec.сfg). Then check the path where you inserted this file. If everything is OK, and you have made sure that this is not the problem, then do the following:
Open Steam, press the right mouse button on the CS:GO icon and choose “Properties…” Then find the “Launch Option” section and type +exec autoexec.cfg.
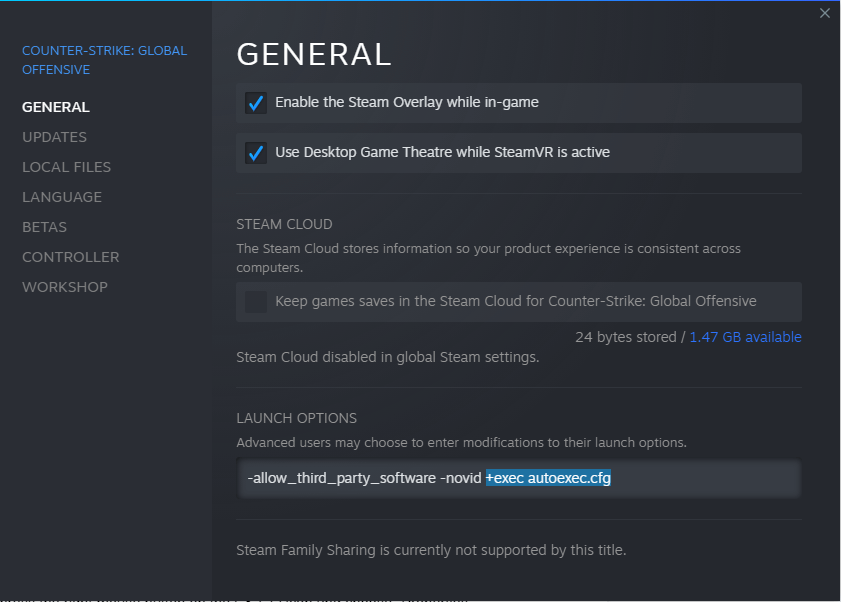
Now, when you start the game, this command will automatically run your autoexec.
How to Edit CFG Files?
Editing a cfg file is quite simple. Go to Program Files (or Local Disc C:)\Steam\userdata\”your Steam ID”\730\local\cfg. Find the config.cfg file, rename it to config.txt, open it, and change the settings you need. But be extremely careful when editing and changing only the parameter value. If you change the command itself, you may experience certain problems during the game.
You can also add some commands through the console, and they will be automatically written to your config. For example, commands to improve the sound are:
- snd_mixahead 0.05
- snd_headphone_pan_exponent 1.9
- snd_front_headphone_position 45.0
- snd_rear_headphone_position 135.0
If you do not know how to open the console in the game, no worries, we have it covered up next.
How To Activate And Open The Console In CS:GO
In older versions of CS:GO, this was a fairly common question, and its solution was very inconvenient and incomprehensible for inexperienced users. Now, the developers have greatly simplified this procedure. All you need to do is go to the game settings, select the “Game” tab, and in the “Enable Developer Console” option, select “Yes”.
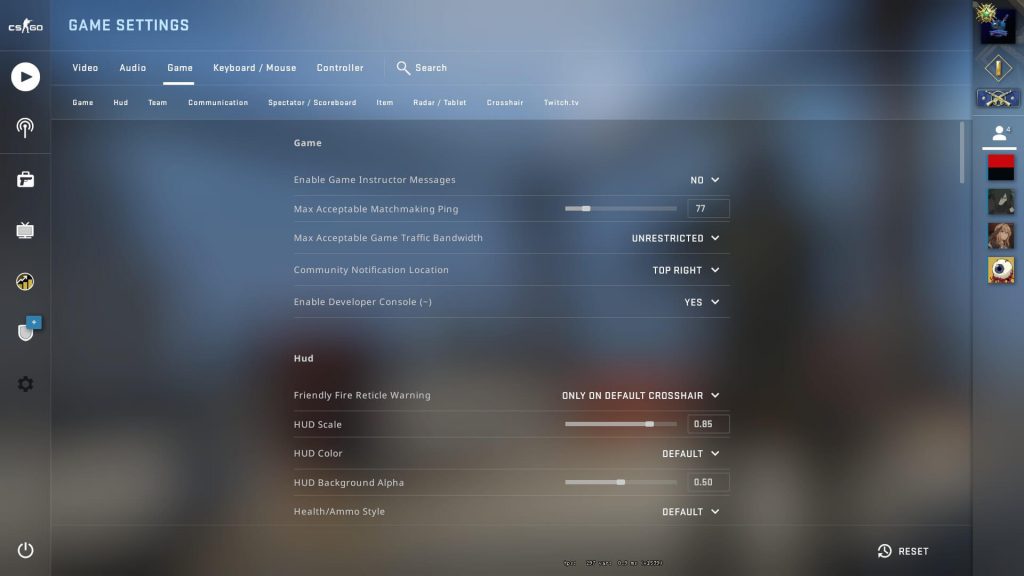
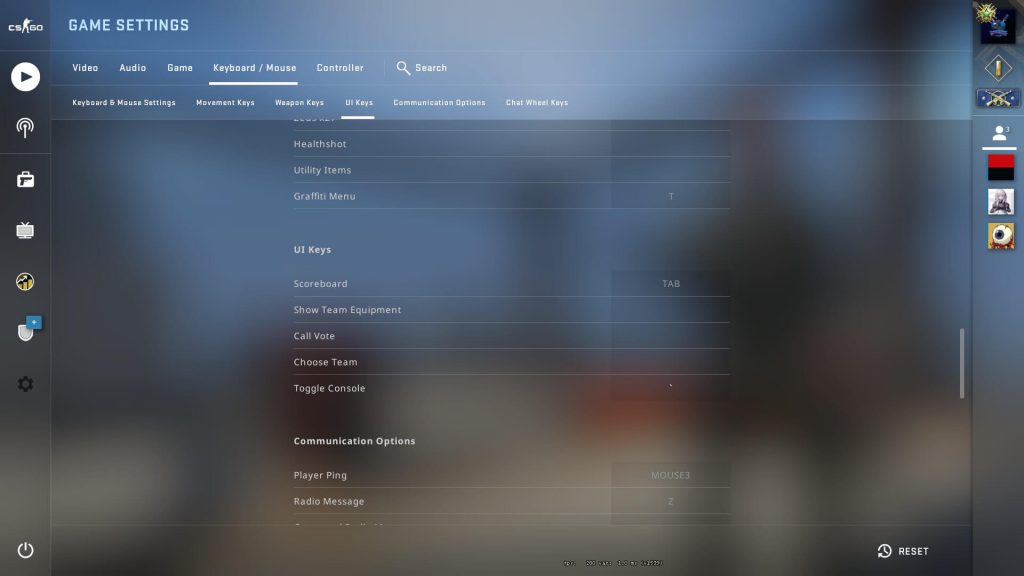
Now you can open the console with the “~” key by default. You can change it by going into the game’s settings, selecting the “Keyboard/Mouse” tab, then selecting the “UI Keys” sub-tab, finding the “Toggle Console” option, and setting the key you want.
Now you can use the console. Through it, parameters are set that are absent in the game settings menu, for example, viewmodel settings.
Viewmodel Config in CS:GO
This is a type of command that changes the position of the hands in CS:GO. They can be entered through the console or directly searched in the config.cfg file and changed their values.
- cl_righthand 0 – weapon in the left hand
- cl_righthand 1 – weapon in the right hand (default)
- viewmodel_offset_x {value} – position along the X axis (left / right). Available values range from 2 to -2
- viewmodel_offset_y {value} – position along the Y axis (top / bottom). Available values range from 2 to -2
- viewmodel_offset_z {value} – position along the Z axis, which looks like top/bottom position in game. Available values range from 2 to -2
- viewmodel_fov {value} – Additional console command to adjust the length of the arms. Available values range from 54 to 68
Play around with the values of these parameters and set the best for yourself.
Also, a useful сonfiguration that you cannot do in the game settings menu is the radar settings .
Radar Config in CS:GO
Radar is your main source of information. It must be simple and convenient. The shorter delay in gaining information, the higher the speed of decision-making in the game. It directly affects your impact in the round. These commands will help you achieve maximum efficiency and reduce the influence of the human factor on the game.
- cl_radar_rotate 0 – static radar
- cl_radar_rotate 1 – dynamic radar
- cl_hud_radar_scale {value} – radar size. Available values range from 0.8 to 1.3
- cl_radar_icon_scale_min {value} – icons size on radar. Available values range from 0.4 to 1.0
- cl_radar_always_centered 0 – center of the radar, relative to the map
- cl_radar_always_centered 1 – center of the radar, relative to the player
- cl_radar_scale {value} – the size of the displayed part of the map on the radar. Available values range from 0.25 to 1.0
All these settings are optimal, and we recommend you use them. Remember that you can always adjust them for yourself.
If you are having difficulty setting up and cannot understand whether these changes have benefited you, try the pro player config.
How to Set Up Pro player’s Config in CS:GO
First, create an autoexec file into which you copy your old config, as we described earlier. Then download the config of your favorite pro player, replace our config with the downloaded one, and you’re done.
Here are the configs of several well-known professional players:
- s1mple CS:GO config
- XANTARES CS:GO config
- b1t CS:GO config
- NiKo CS:GO config
- m0NESY CS:GO config
- ZywOo CS:GO config
- ropz CS:GO config
If, after enabling the game, you still have the old config, check the game launch options. If there is a +exec autoexec.cfg command, delete it, and restart the game.
To Wrap Up!
Now, in the case when you buy a new PC or want to play on a friend’s computer, you can set your settings in a couple of clicks using config.cfg and autoexec.cfg. In this case, the original settings will also be saved.
If you find this article informative, we advise you to visit our blog . There you will find a lot of useful and interesting information about the world of CS:GO. Good luck!