Despite its age, CS:GO remains one of the most popular games in its genre – having recently broken a record for the most concurrent players.
The main reason for such stability and prosperity is game updates that include skins, visual updates, as well as maps – bringing more variety to the game.
But it’s not only Valve that creates new maps for CS:GO, you can do it yourself too. In this article, we will tell you in detail how to create a map in CS:GO and upload it for everyone to see.
In article you will find:
What You Need Before Jumping Into Building Maps in CS:GO?
Before proceeding to the very process of creating maps, you need to install the editor for creating maps – “Counter-Strike: Global Offensive – SDK”.
Players who bought CS:GO before it became free-to-play already have this editor. It was an additional tool after buying CS:GO. If you started playing CS after the update in which it became free, then you need to purchase this editor. It comes with Prime status on Steam.

It’s also worth saying that the editor is pretty easy to learn. In just a few steps, you will learn all the basics of map creation.
Creating a Map in CS:GO
Absolutely all the maps you have ever played were made with this editor. This means that, with enough skill and patience, you might be able to make something as great as Anubis or Dust . So, let’s go directly to the creative process itself.
Step 1: Launch the Hammer World Editor
First, we need to find and run our tool. Open Steam and go to the Library. In the upper left corner, you need to set all the markers, and in the search bar, write “SDK” and run it.

After launch, a dialog box should appear on your screen in the old nostalgic design of CS 1.6. Here we need to select “Hammer World Editor”, in which we will continue our work.
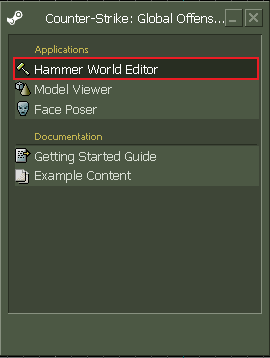
The editor also looks in the style of Windows XP, but most likely, the developers did this to optimize this program.
Step 2: Create a New Project
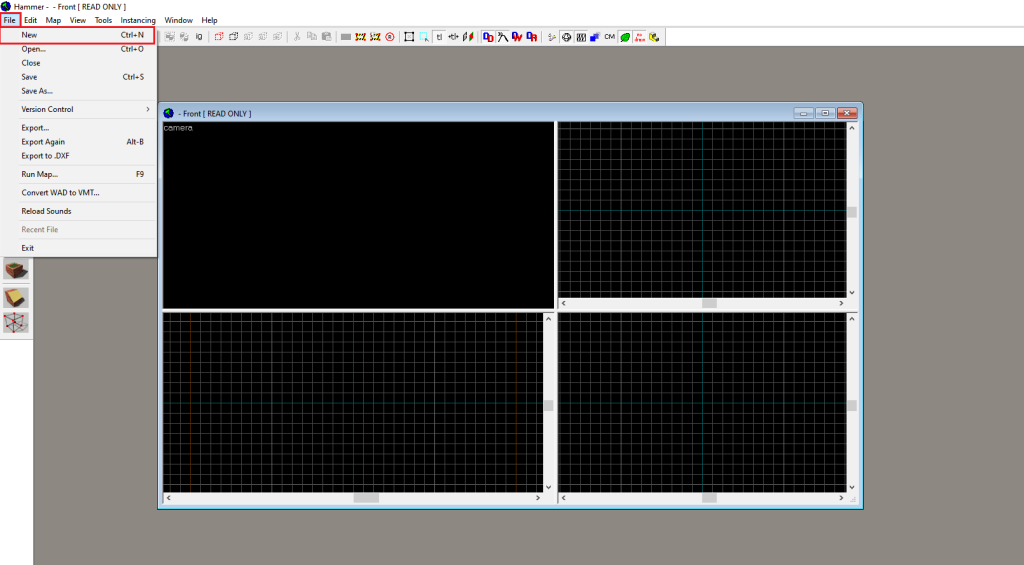
The next thing we need to do is to create a new work file. To do this, in the upper right corner, click on “File” and select “New” or use the hotkey combination Ctrl + N.
On the screen, you will see four fields. The top right is a top view, the bottom right is a side view, the bottom left is a front view, and the top left is a 3D rendering of whatever you’re creating. You can change the viewing angle using the “wasd” arrow keys and mouse wheel.
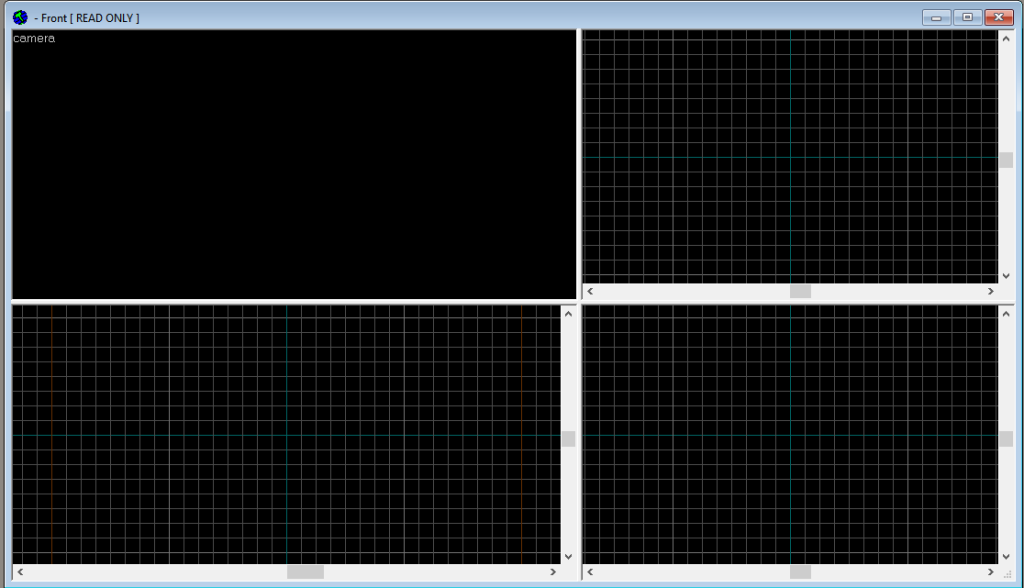
You got acquainted with the working field now we can proceed to the creation of the map itself.
Step 3: Start Creating Your First Objects on the Map
First, we need to create a map space. Select the tool shown in the picture and draw a square or rectangle.
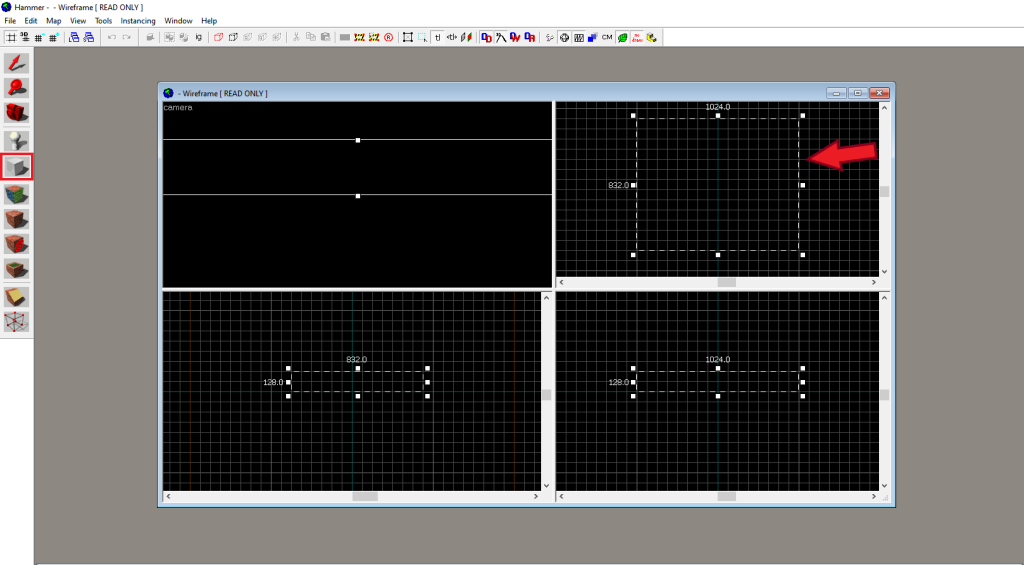
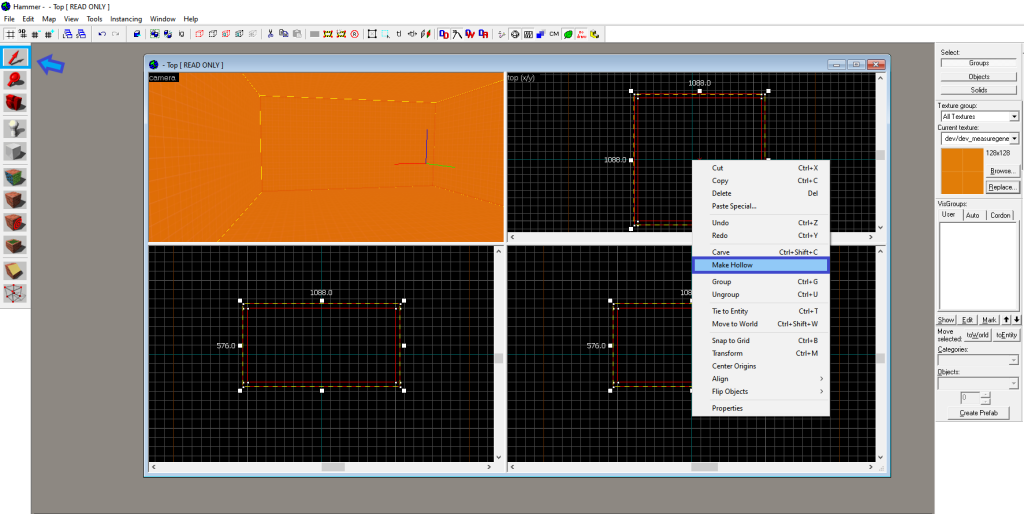
In the lower left window, change the height of your map and press Enter. Now select the space you created with the “Selection Tool” and click on it in the top left window (it should glow yellow). And in the upper right window, right-click, select the “Make Hollow” option, and set the value to “-32”.
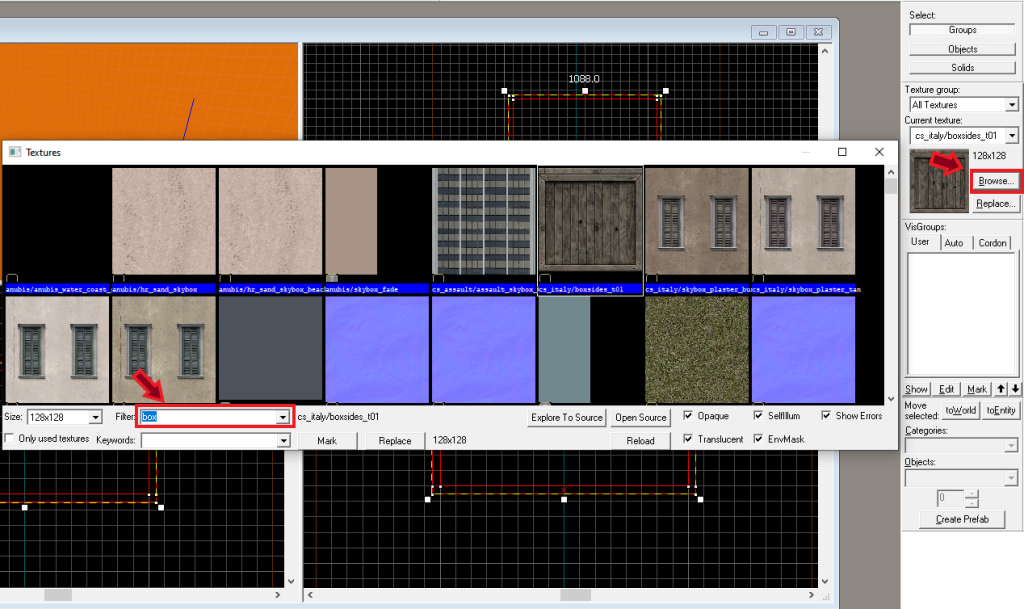
Now your cube has a cavity, and we can add some details inside. Let’s create a box. First, you need to choose the texture of your box. To do this, click “Browse” on the right side of the screen, enter the word box in the filter line, and select a texture from the list of suggested ones.
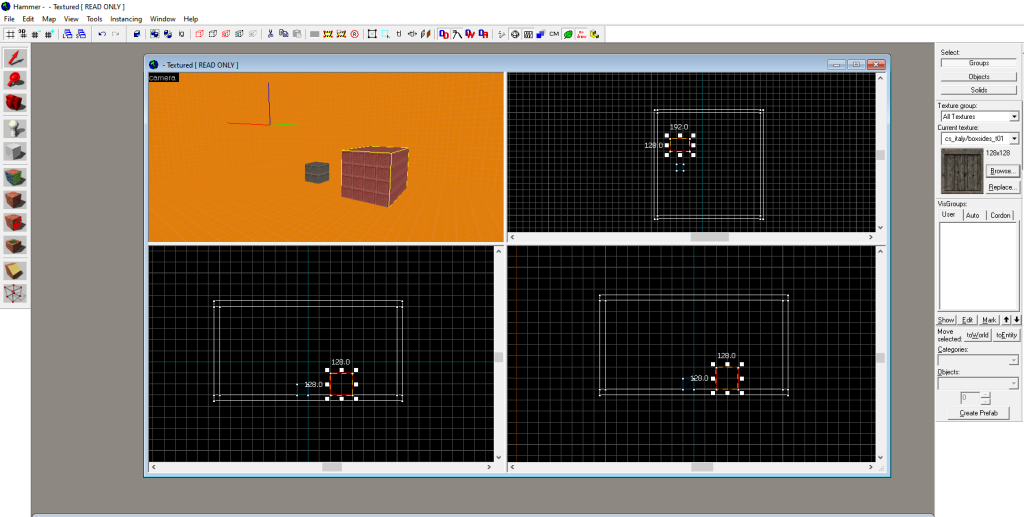
Now select the tool with which we drew the area of our map and draw a box in the top right window. Change the height in the other two fields and press Enter.
You can also cut and rotate around the axis of the created objects. To rotate them, double-click on the object. And drag the mouse in the needed direction.
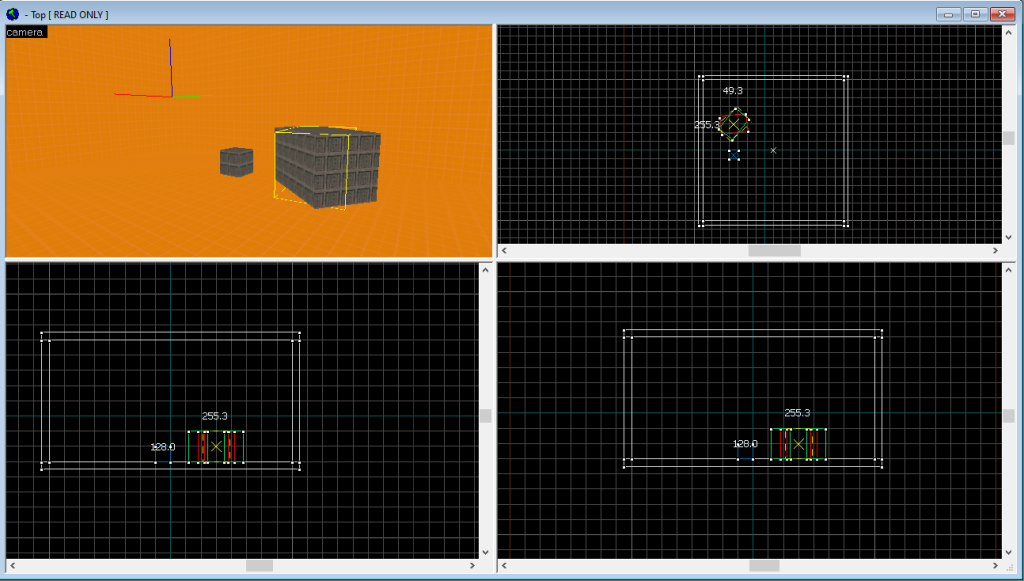
To cut the objects, you need to choose the object with the “Selection tool” and use the “Clipping tool”. The pre-selected object will highlight in red, and you can cut it in any of the windows except the top left one.
Let’s create several boxes behind which we will place players’ spawn.
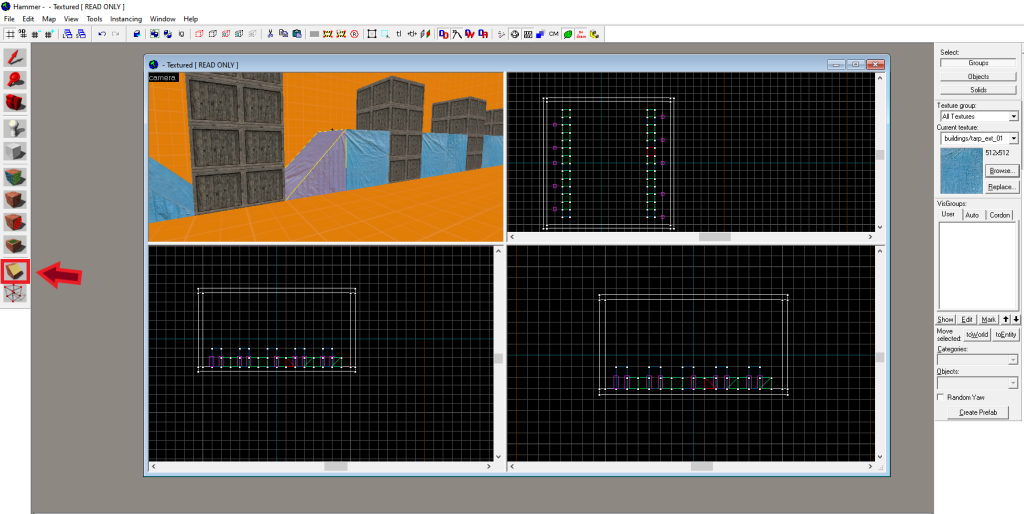
Step 4: Set Player Spawn Areas
To create a spawn, select the Entity tool, and draw places for spawns in the upper right window. Create spawns behind the boxes, first terrorists, because it is set for default. After you place the T spawns in the bottom right corner, you need to change “info_player_terrorist” to “info_player_counterterrorist” and then place the CT spawns.
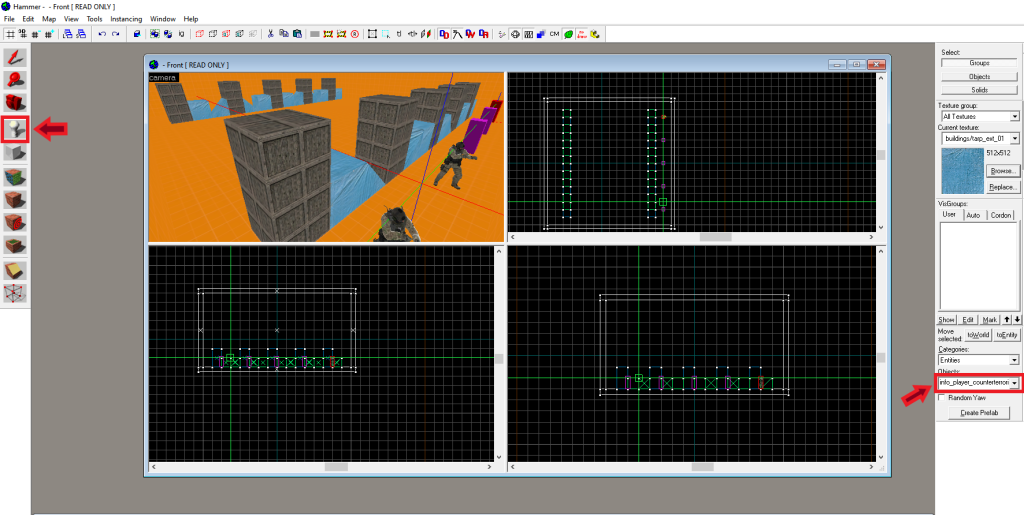
You should end up with something like this:
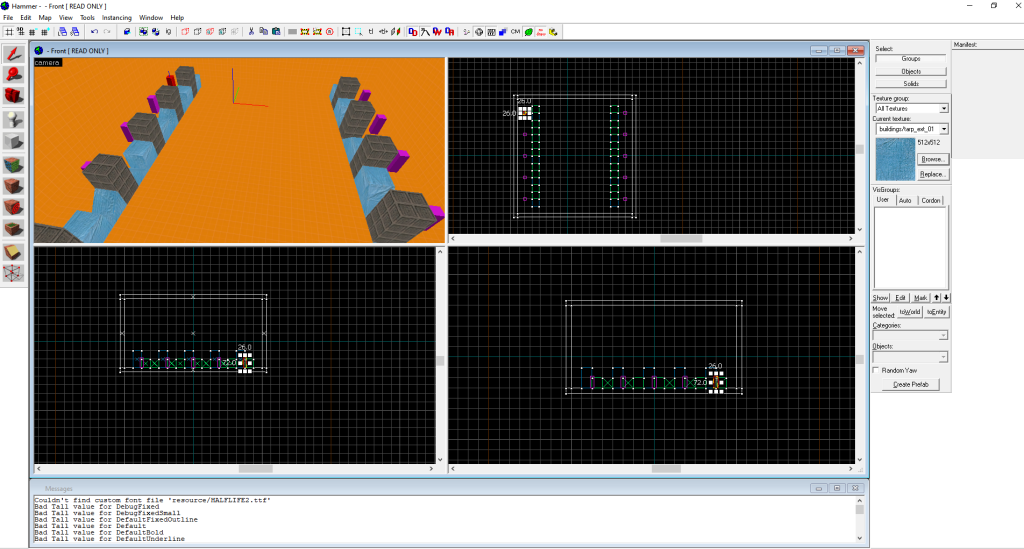
Now you should create a more playable look for our map.
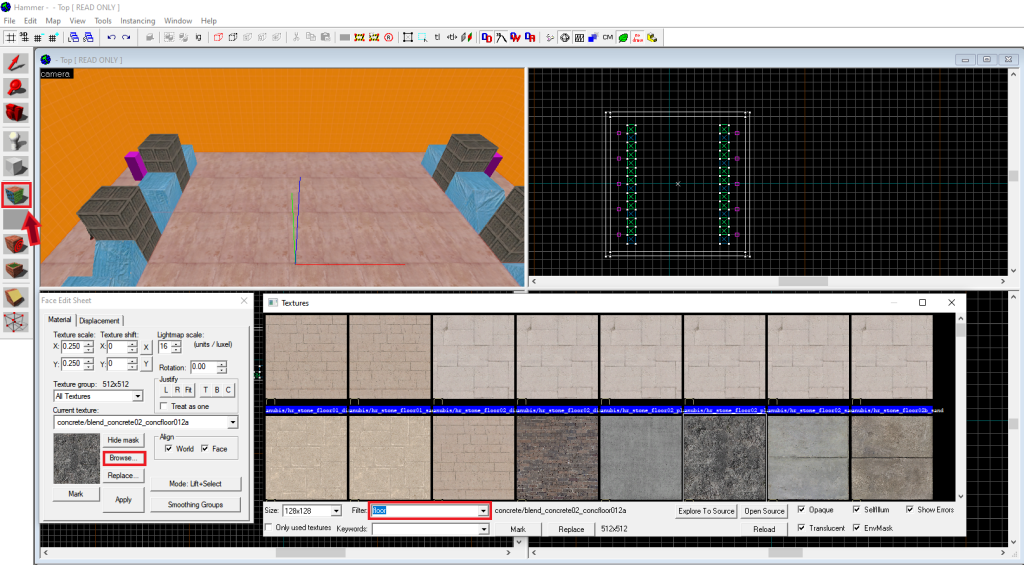
Step 5: Giving Our Maps Textures and Lighting
Let’s change the textures of the floor. To do this, select the “Toggle texture application” tool and select the floor in the upper left window. Then in the window that opens, select “Browse” in the “Filter” search line, write “floor”, choose the texture you like, and double-click on it.
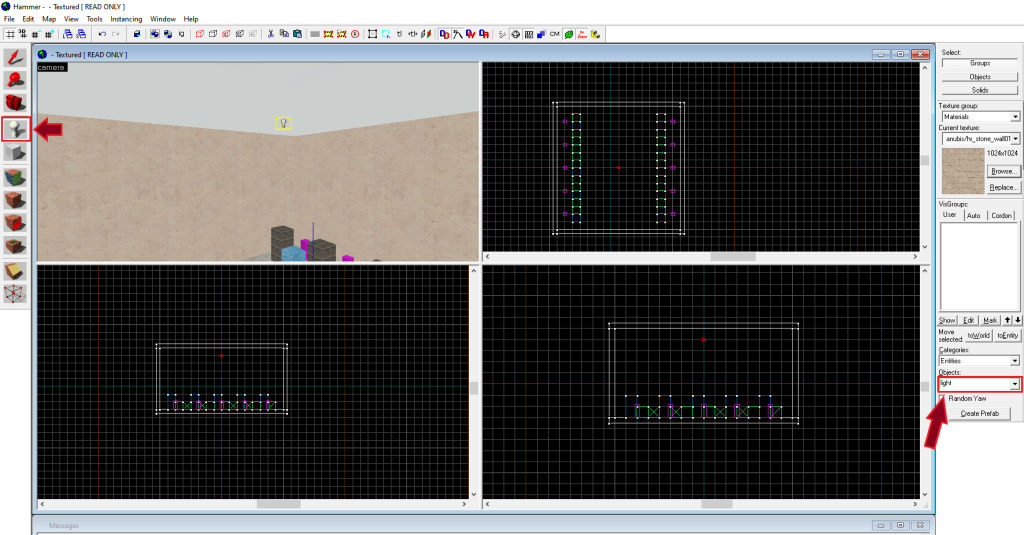
Do the same for the walls and ceiling. It starts to seem like a pretty good “aim_1vs1_map”, but you still need to add light on our map. To do this, use the “Entity tool”, which we used to create spawns, write “light”, and draw a dot in the upper right window. Try to move it high enough and in the center so that it illuminates the entire map evenly.
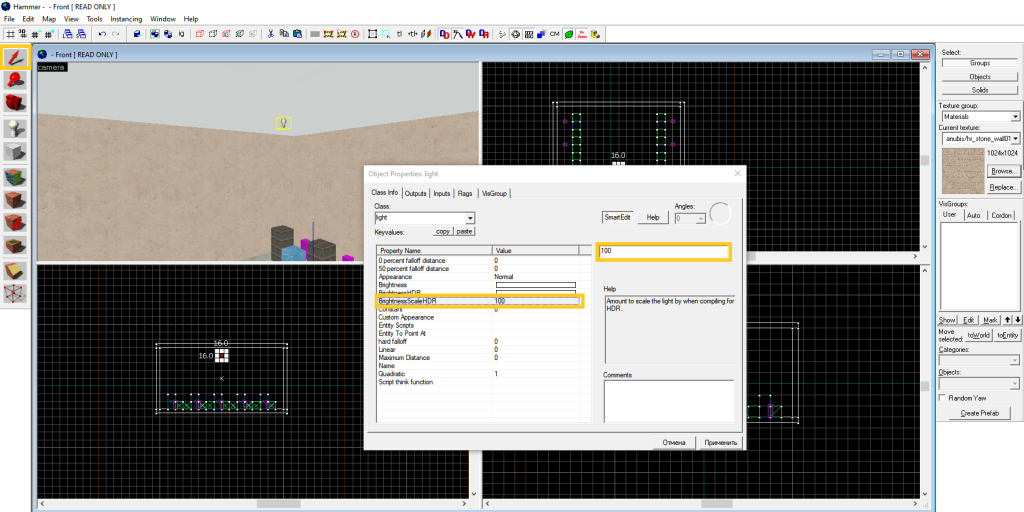
Then, using the “Selection tool”, double-click on the light bulb in the 3d view window. Set “BrightnessScaleHDR” to 100 and click “Apply”.
The map is almost ready there remains only to add a buy zone, or since this is an aim map, let’s add weapons directly on the map.
Step 6: Placing Weapons on the Map
To do this, select “Entity tool”, and in the line where you previously entered “light”, write “weapon_ak47”, and in the upper right window, select the place where the weapon will lie. Let’s place it immediately in the player’s model so that, after spawning, the weapon will appear in hand.
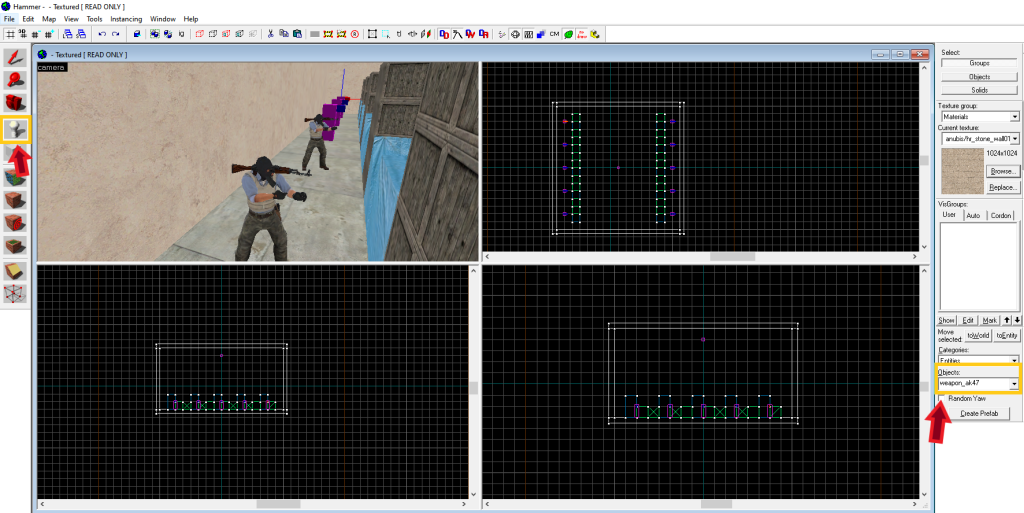
For those who like to shoot with M4, Deagle, or other types of weapons, you can also add them to the map. Now let’s test what you got.
Step 7: Compile and Run Your Map
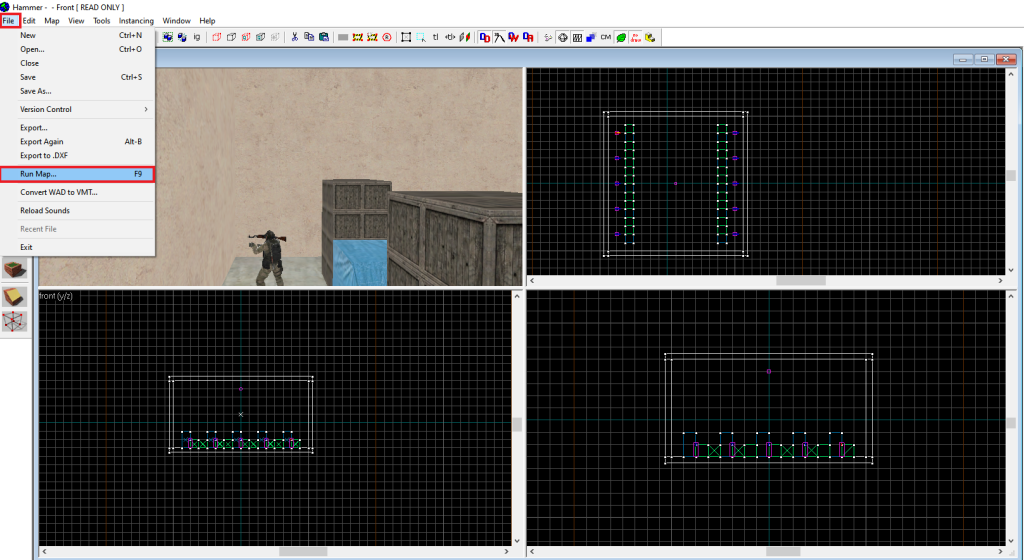
To do this, in the upper right corner, click “File” and select “Run Map …”
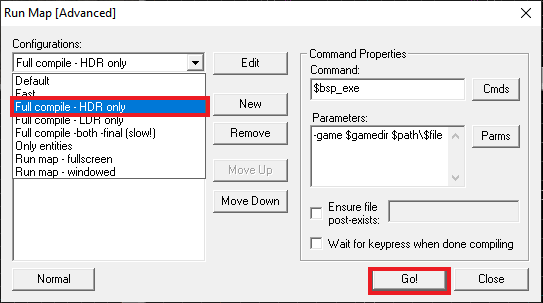
You will see a save window in which you need to name the map, after which you will see the launch options window. In this window, you need to click “Expert”, then in the “Configurations” line, select “Full compile – HDR only” and click “Go!”.
Congrats, you have created your first map in CS:GO! We have only told you about the basics of using the Hammer Editor editor. There are many more functions, but we recommend you learn everything gradually.
Other Technical Details You Should Consider Before Creating CS:GO Maps
As you deepen and gain knowledge and skills in creating maps in CS:GO, you can move on to more complex details. Developers provide you with a very wide range of them:
- Lighting Improvements
- New Shader Features
- Hammer Editor Improvements
In more detail, you can get acquainted with these improvements on the official site .
Having mastered these features, you will be able to bring your map to perfect condition, and perhaps in the future, Valve will offer you to add your map to the game, and it will become the favorite of millions. Yes, this process will not last quickly, but you need to start somewhere.
A great decision will be to start by adding your product to the Maps Workshop for everyone to see.
Uploading Your Map to CS:GO Workshop
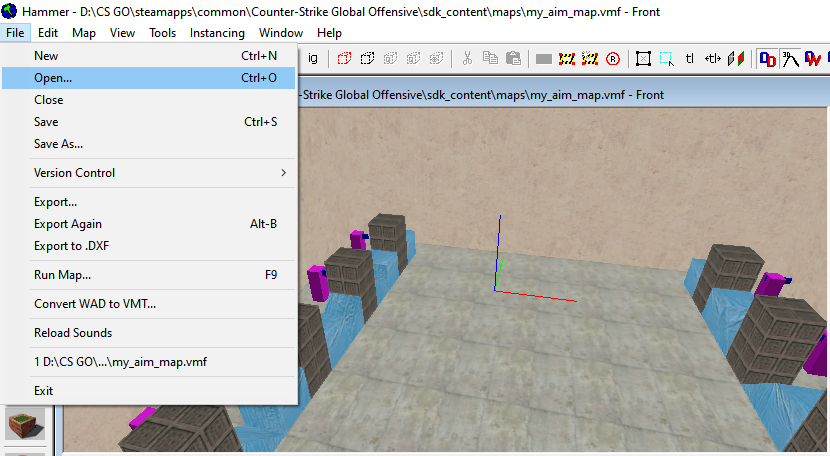
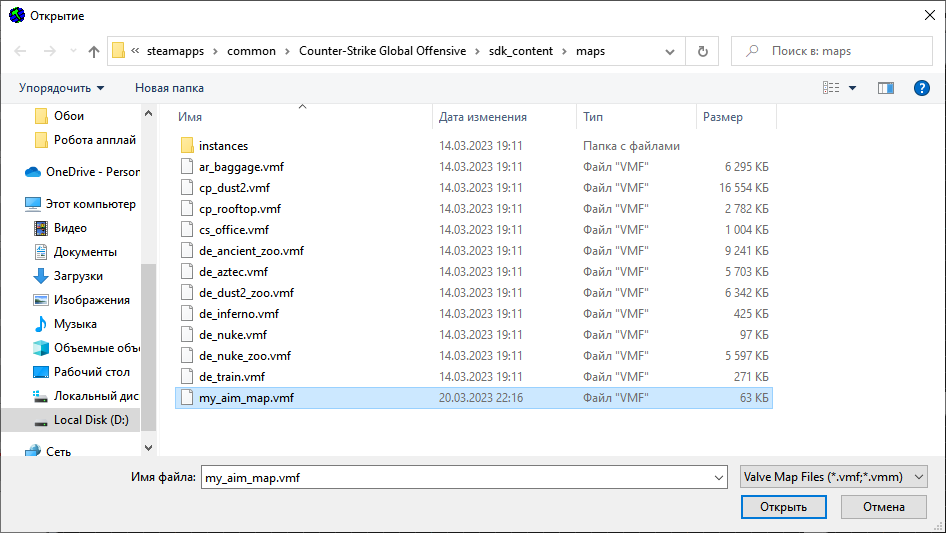
To upload your map to the Workshop, first go to the Hammer Editor. If you close the editor before, then you need to open your savings. To do this, click “Open” and select the map you need. In our case, this is “my_aim_map.vmf”.
Next, launch the map as we showed earlier, but set the following launch settings:
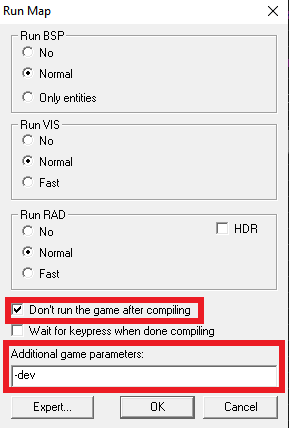
After that, go to the game itself and turn on the console. If you do not know how to enable the console, we advise you to read our article on this topic. So, open the console and enter the following command “workshop _publish” (without quotes).
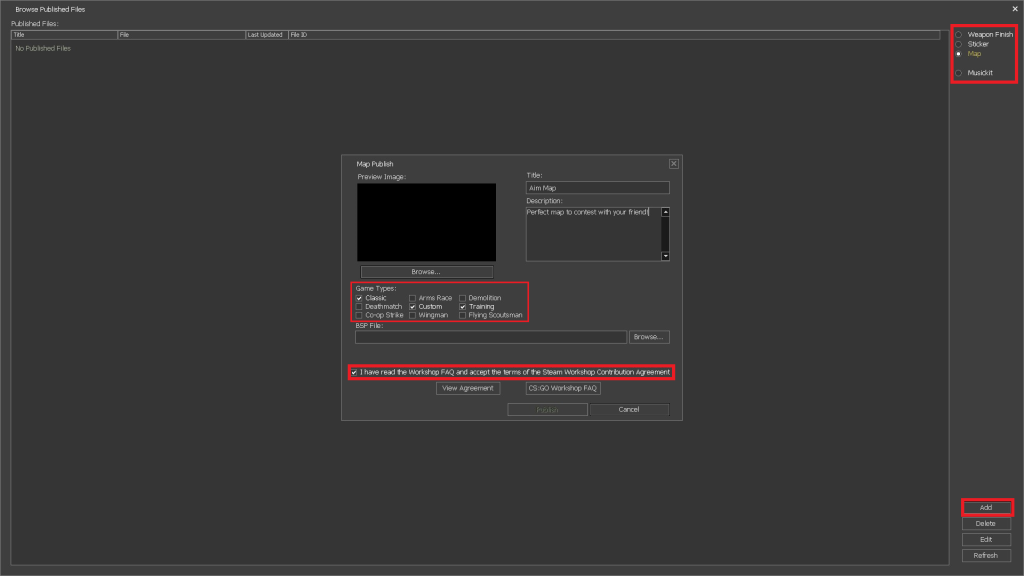
In the opened window, we select “Map”, and in the lower right corner, click on “Add”, fill in the required fields, and add a picture. We also advise you to set the following parameters in the “Game Type” for a map of such a non-standard format as an aim map.
Next, you need to select your map in the game files. To do this, in the “BSP File” item, click “Browse”, then “csgo\maps”, and somewhere in this list, there will be your map. Select it and click “Publish”. After that, an agreement window will open in which you need to enter the phrase “I understand”. Congratulations, your map is now in the Workshop!
To Wrap Up!
Creating maps in CS:GO is a pretty hard task. But also, it is a great opportunity to feel like a developer. It will not be easy to master this craft, but hard work is always rewarded. If the community likes the map you created, then there is a chance that the developers will add it to the game, and you will get a profit from it.
We described this in more detail in our article about the Workshop. We also advise you to visit our blog . Stay up to date with news about the world of CS:GO with us.
FAQ
Q1: How do I add a map to the workshop?
A1: Open the developer console in the game and enter the command “workshop_publish”. In the “BSP File:” select “csgo” then “maps”, select the previously saved map, and click “Publish”.
Q2: How do you make a map on Counter-Strike?
A2: Absolutely all maps in CS:GO are created with the Hammer Editor, which you can purchase along with Prime Status. If you bought CS:GO before it became free, you already have this editor in your Steam Library in the “Tools” section.