Creating any kind of content is always an interesting and informative task. Artists, musicians, and other authors spend a lot of time and effort to bring their creations to perfection. This also goes for content creators in CS:GO. In this guide, we will touch on such a seemingly insignificant item inside the game as stickers. CS:GO stickers in the workshop are a unique and fun way for players to express their creativity and personalize their in-game items. You will learn how to create your sticker, and how to upload it to the workshop, and in which case, you will earn a profit from it. Let’s begin!
In article you will find:
What You Need Before Creating Your Own CS:GO Sticker?
Stickers are in-game cosmetic items. They drop out of capsules, and you can sell them on the Steam marketplace. Players can glue them to the weapon, and they do not have exterior gradation but can be partially or completely erased (the quality of the skin will not deteriorate). The only stickers created by the developers from Valve are tournament stickers, and the rest – are by ordinary users who receive a percentage of the sale of their stickers.
Creating a sticker is not that difficult, especially if you already have the skills to work with Photoshop or other image editors. If not, then anyone can learn it. The main thing is desire.
Before proceeding directly to the process of creating stickers, you need to install an image editor. We recommend using Photoshop (or other editors), VTFEdit (converter tool), and CS:GO – SDK for testing and publishing to the Workshop.
Also, it will not be superfluous to familiarize yourself with the Steam Workshop. There you can find examples of the work of other users and maybe get some dose of inspiration and motivation.
Brief Overview of Workshop
The Workshop is where people post content for games on Steam. In the case of CS:GO, these are custom maps, skins, music packs, and stickers. The best works that have received the most positive user reviews can be added to the game by developers. You can learn more about CS:GO Workshop by reading our article.
Now let’s return to the main topic of the article – stickers, or more specifically, their types.
Different Types Of CS:GO Stickers
Stickers, as well as weapons, have quality. In total, there are four types of quality:
- High grade
- Remarkable
- exotic
- Contraband
- Souvenir sticker
You can’t obtain the latter one in an unglued form. But you can get them with the weapons from souvenir boxes.
In addition to the quality of the sticker, there are also different variants:
- Standard Glossy — standard glossy sticker with no backing. After scraping them off, you’ll find a weapon model underneath.
- Paperback — standard, high-gloss, hard-backed sticker. If you scrape them off, you will find the paper backing until it is completely removed.
- Holographic — a paper-based sticker with additional texture layers to create a holographic effect. Different areas of the same sticker may use different patterns for holographic reflection.
- Metallic — a standard decal that looks embossed and has a metallic sheen.
- Gold — a metallic effect on a gold-colored sticker.
In this article, we will show you how to make a sticker in the Standard Glossy and Holographic versions, for example. It will be easier to do than a holographic one and will suit those who have just started to get acquainted with this topic. The main reason is that you need to create at least two variants of stickers to post in the Workshop.
Creating a Glossy Sticker in CS:GO
In this section, we will create an image in Photoshop and format it for later use. There are many different techniques to create a sticker, but if you are a beginner, then it’s better to start with this one.
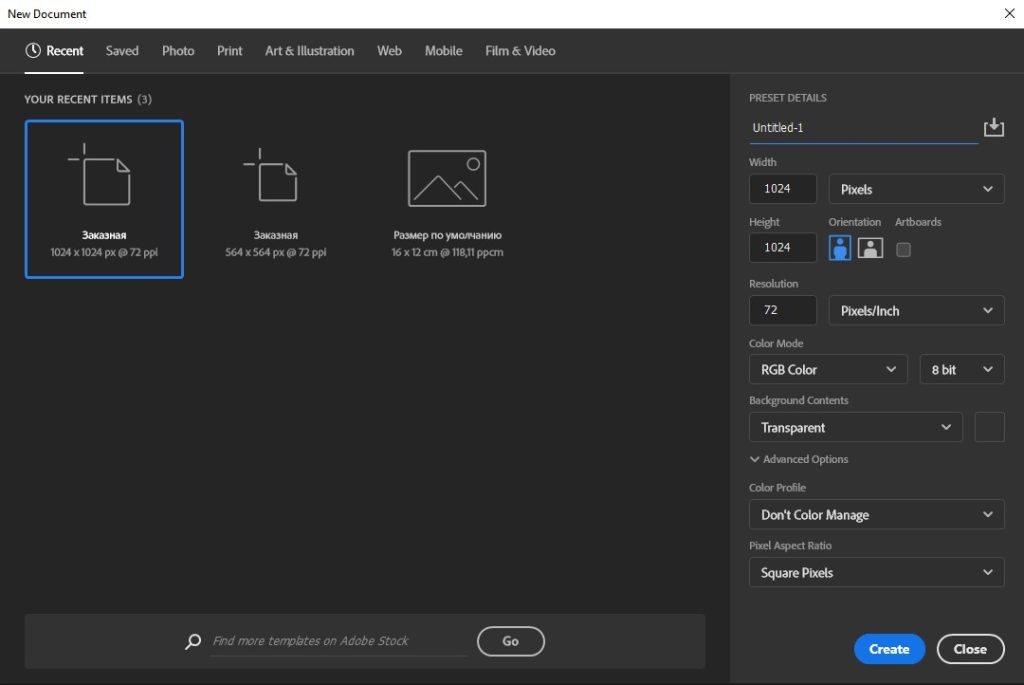
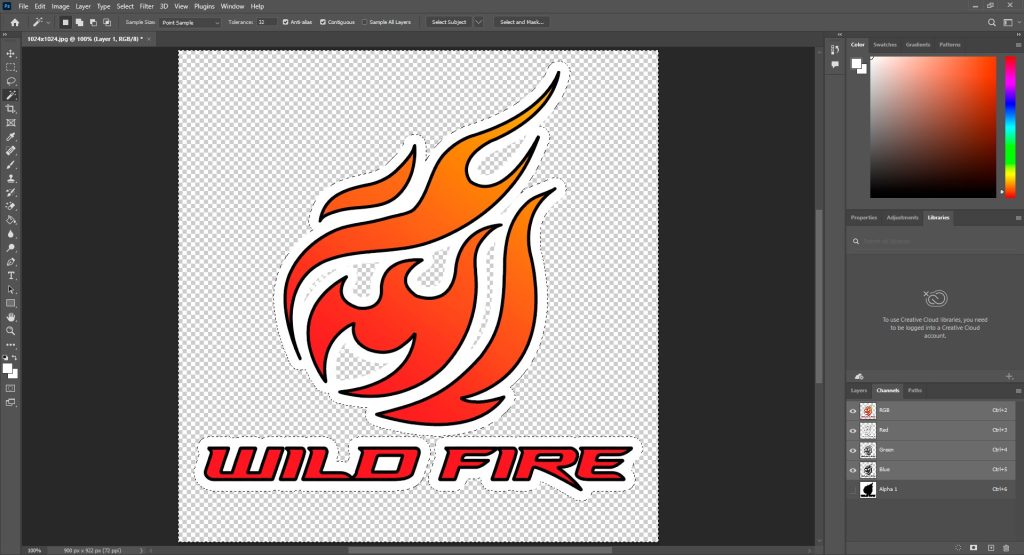
First, open Photoshop and create a 1024×1024 format field (2048×2048 is also possible). You must also have a pre-created image for your sticker. Do not take pictures from Google to avoid copyright problems. Be original and create your sketch.
Then drag your sticker thumbnail onto the created work field in Photoshop and stretch the image to the edges.
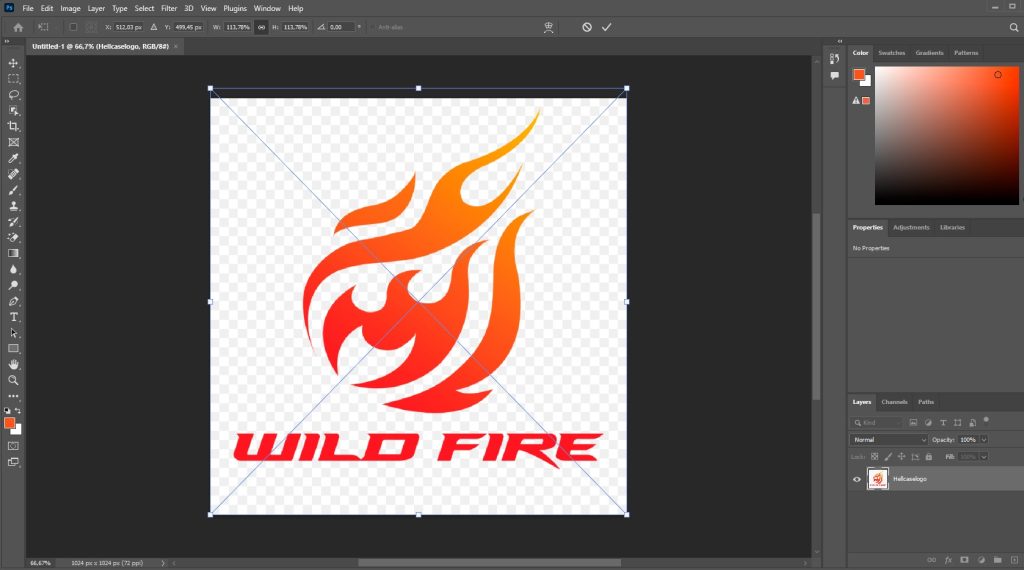
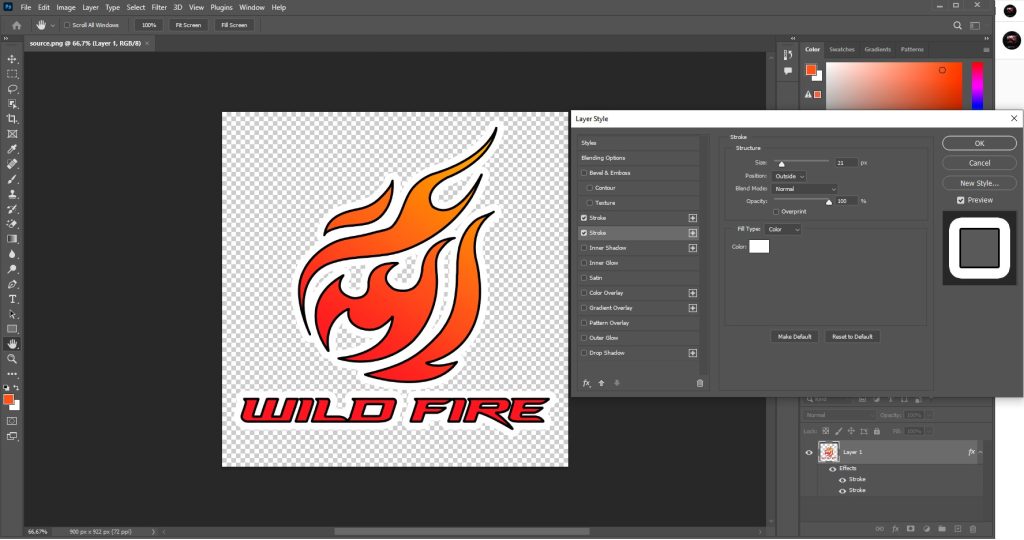
We advise you to always add a stroke to the sticker (usually white) so that its outlines can be better visible on weapons in the game. Also, you can make a black contour at first and then add white around it.
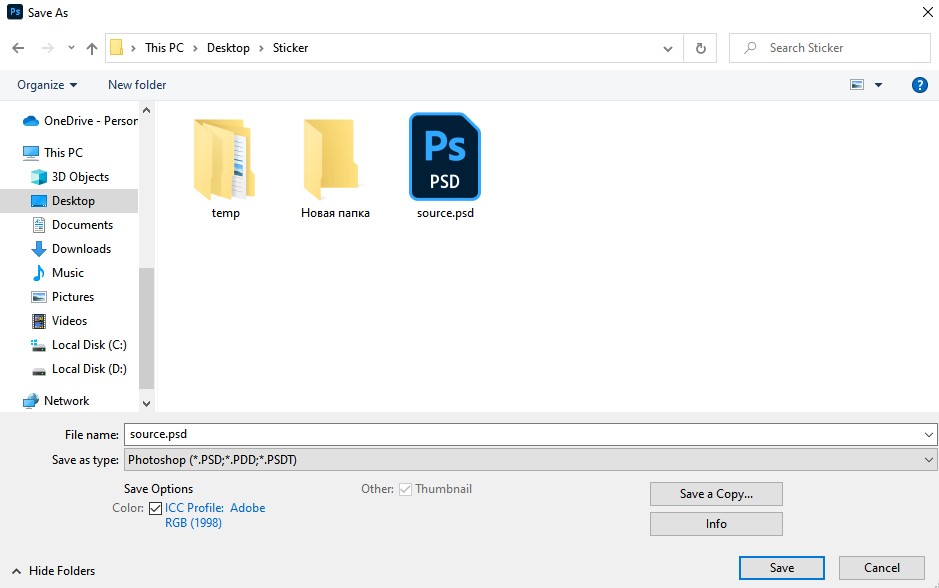
Next, you need to save this image and rename it to source.psd in the pre-prepared folder for the sticker. To do this, in the upper left corner of the screen, click “File” and select “Save As …”. Save the file in .psd format.
To create a holographic sticker, you need to do a little magic in Photoshop.
Creating a Holographic Sticker in CS:GO
The holographic version of the sticker is the most diverse. There you can endlessly play with colors and reflections.
To make a holographic sticker, we begin in the same way as with the first one. Add a picture of our sticker and select the Magic Wand tool in Photoshop. Use it to choose the whole of your images and press copy (Ctrl + C). Then we create the Alpha 1 channel.
Now we delete all other channels except Alpha 1. Create three new layers and name the first one Red, the second Green, and the third Blue.
Each of these layers will be responsible for a specific effect. In this case, the Red channel is responsible for the holographic effect of individual parts of the sticker. If you don’t want any part of the image to be holographic, then paint it black or white for the opposite effect. The blue channel is responsible for saturation, and the green channel is responsible for the clarity of the holographic effect.
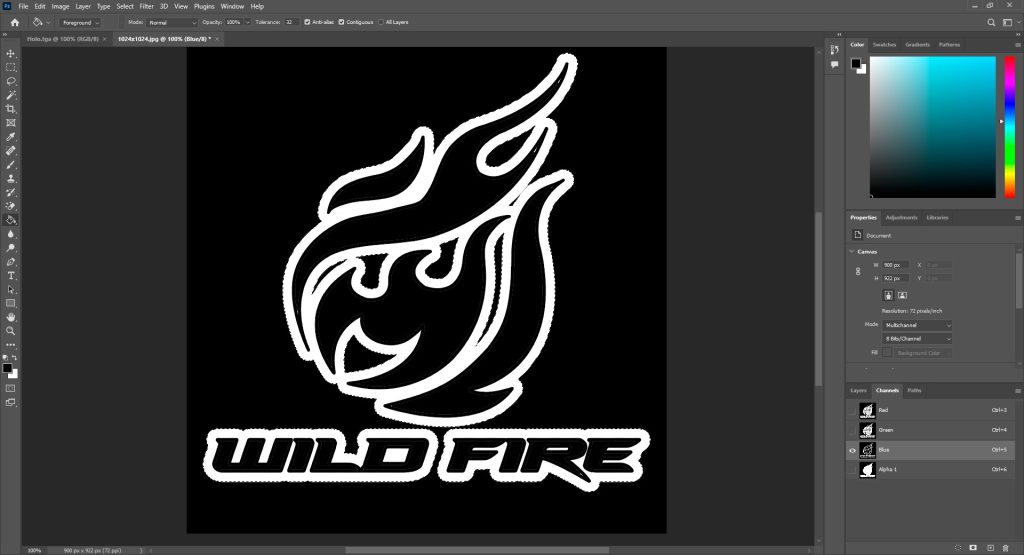
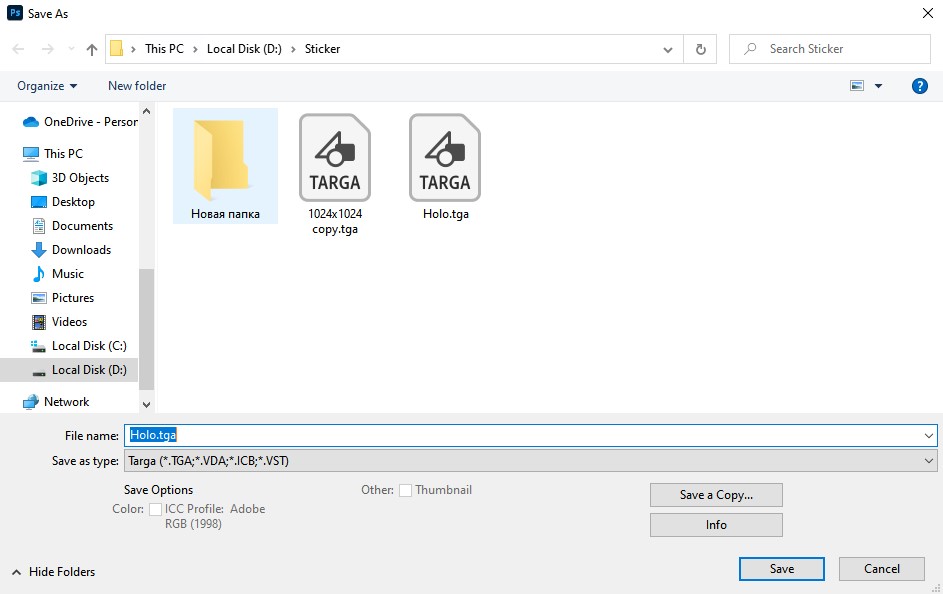
After that, place an eye near all channels and go to the “Image” tab, then “Mode” and select “RGB Color”. Then save our file as we did above but in .tga format.
It is in the editor that you must make every effort to create your product of labor. Now let’s move on to the next step in creating stickers.
Creating A VTF File in the VTFEdit
We need VMTEdit to convert the sticker created in Photoshop into the format we need for adequate functioning directly in CS:GO.
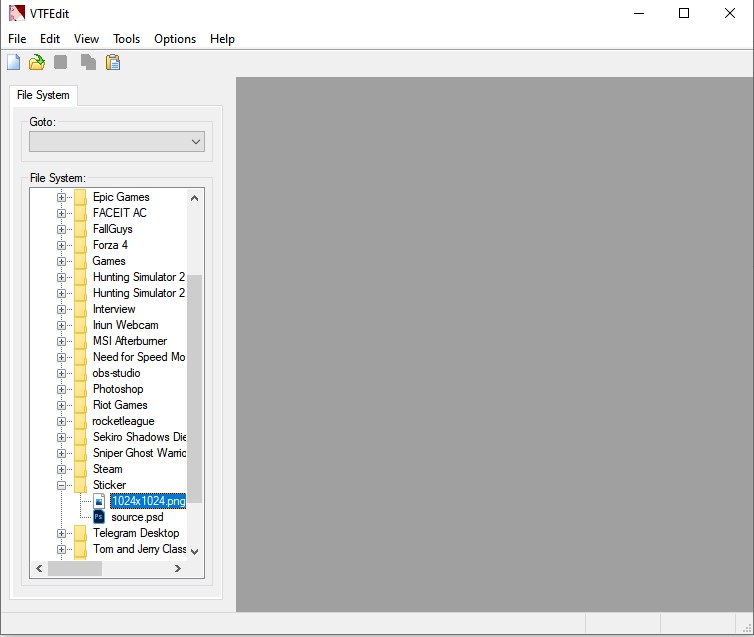
Open the VTFEdit program and import the previously saved .png file. If you cannot find it, we advise you to close the application, move the folder to any local disk, and then run VTFEdit again.
Do not make any changes to the window that opens. Check if your settings match those options in the picture below. If something is wrong, change it as shown:
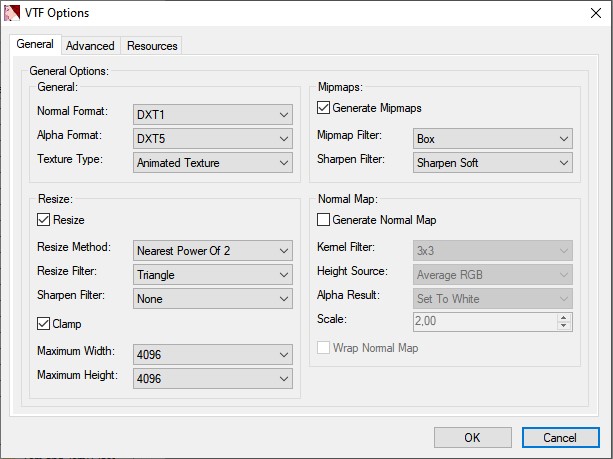
After you open your file, in the menu “Flags:” you need to set the checkmarks near the “Not Mipmap” and “No Level of Detail” items.

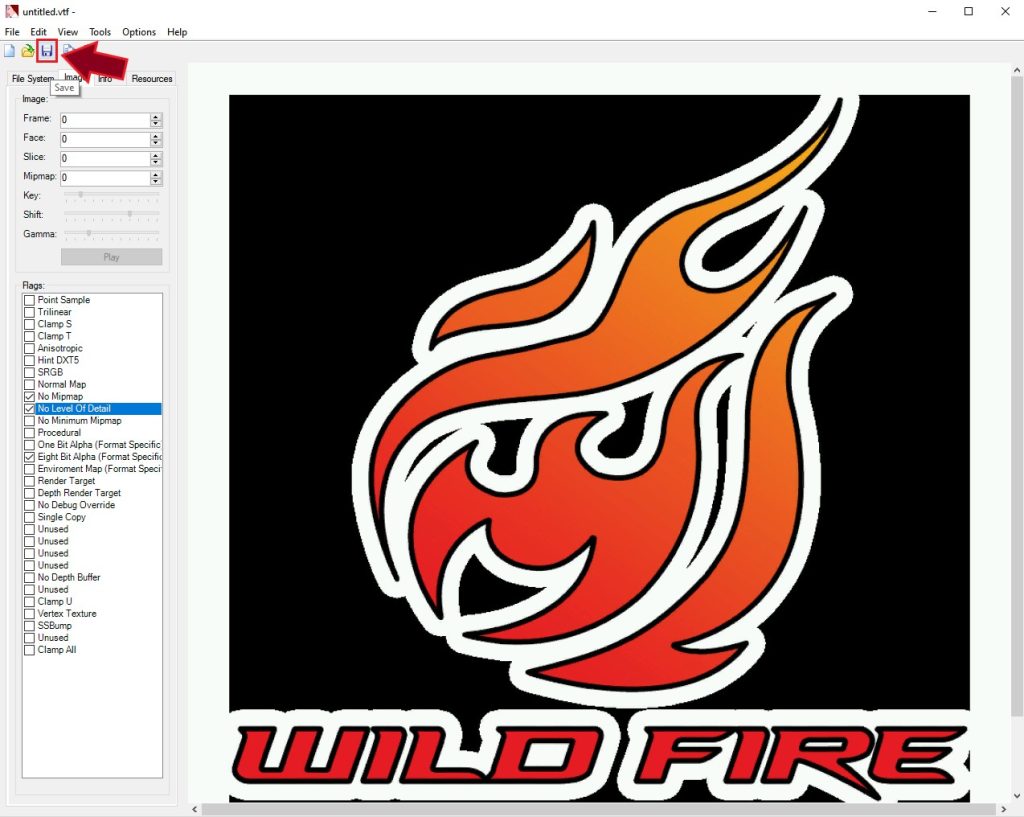
Then we save our file to the previously created folder folders. Come up with the name for your sticker and name the saved “.VTF” file the same.
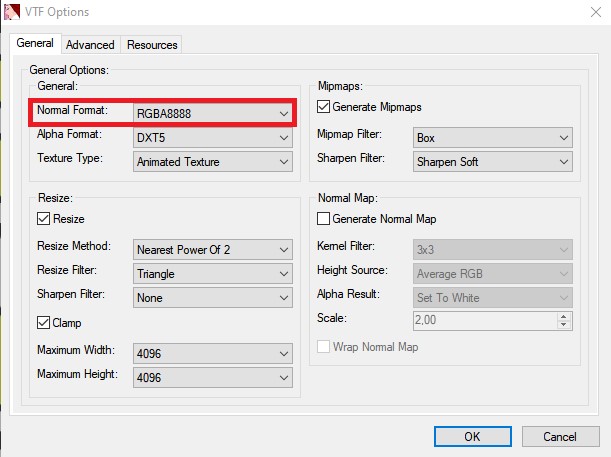
We carry out a similar procedure for the holographic sticker only after importing the “Holo.tga” file in the opened window – you must select RGBA8888. And don’t forget about the checkmarks next to “Not Mipmap” and “No Level of Detail” items.
The file is ready! Now we can move on to the next step. Looking ahead, there you will need maximum accuracy.
Creating A Valve Material (VMT)
In this chapter, we will create a sticker code file. You can find them by clicking on this link . Each sticker variation has a different code. We need to create two different files, one for the regular sticker and the other for the holographic sticker. So, proceed attentionally on this.
First, create a text document in the sticker folder. We insert the sticker code into it, in our case, a variant of the glossy sticker code:
WeaponDecal
{
$DECALSTYLE 0 // glossy sticker style
$basetexture models\weapons\customization\stickers\examples\sticker_chickenlover
$unwearstrength 0.16
$envmap “env_cubemap”
$envmaptint “[ .07 .07 .07 ]”
$phong 1
$phongexponent 2
$phongfresnelranges “[ .2 .5 1 ]”
$phongalbedotint 1.0
$phongboost 1.0
$phongalbedoboost 10.0
}
In the line “$basetexture” we write the path to our .vtf file. Be extremely careful all characters must be written accurately and in order. Be sure to take the inscription to the file to the brackets!
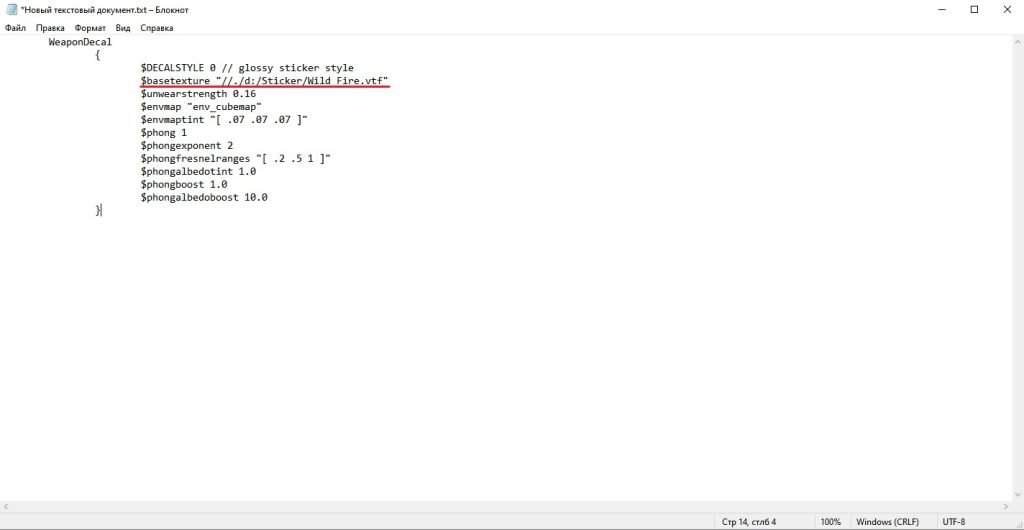
Next, save the text document in .vmt with the same name as the .vtf file, in our case, “Wild Fire.vmt”. Of course, we save it in a folder with stickers for convenience.
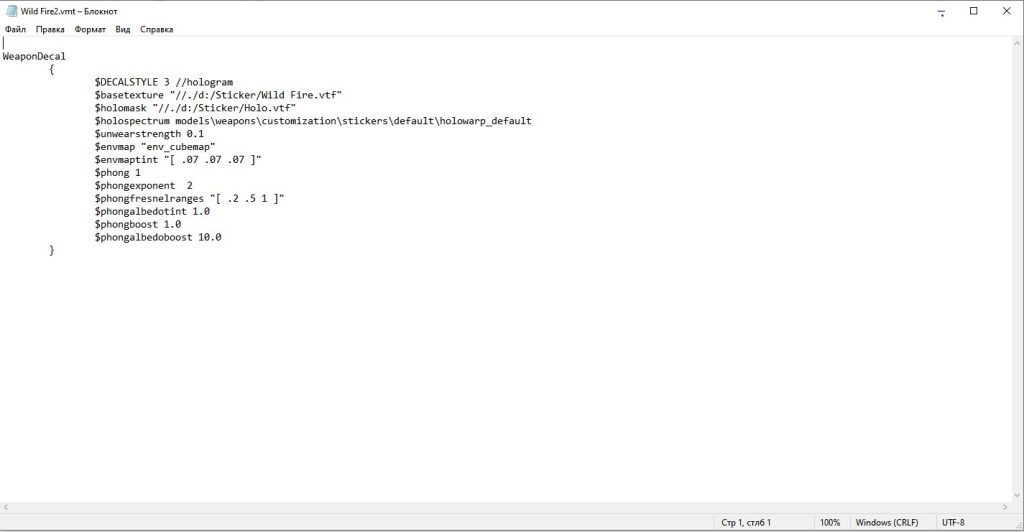
We need to do the same thing with the holographic sticker. We create a new text document in the same folder and paste the following code:
WeaponDecal
{
$DECALSTYLE 3 //hologram
$basetexture models\weapons\customization\stickers\examples\bish
$holomask models\weapons\customization\stickers\examples\bish_holomask
$holospectrum models\weapons\customization\stickers\default\holowarp_default
$unwearstrength 0.1
$envmap “env_cubemap”
$envmaptint “[ .07 .07 .07 ]”
$phong 1
$phongexponent 2
$phongfresnelranges “[ .2 .5 1 ]”
$phongalbedotint 1.0
$phongboost 1.0
$phongalbedoboost 10.0
}
In the line “$basetexture”, we write the path to the sticker as before, and in the line “$holomask”, we type the path to the Holo.vtf file. In our case, it should look like this:
After, save the contents of the text document and rename it to the .vmt format. Congratulations, you have ended this task! Let’s check what we got.
Test of Result in the CS:GO – SDK
Now let’s make sure that we did everything right. We need to check our files. To do this, open to Steam and run the CS:GO – SDK. You can find this program in the Steam Library in the Tools section.
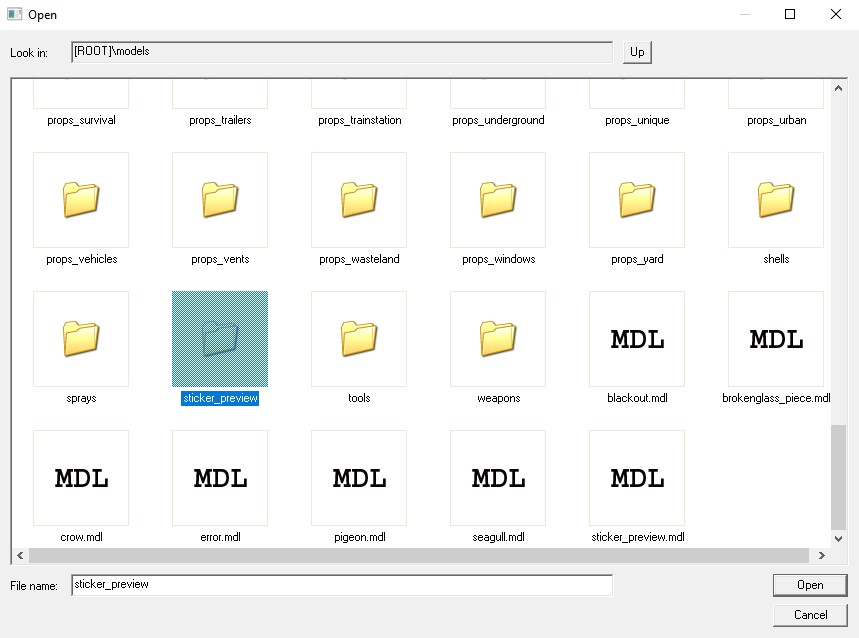
After launching the SDK, select “Model Viewer” and load the model of the weapon on which you want to view your sticker.
To do this, in the upper left corner, click “File” and select “Load Model”. In the window that opens, look for a folder called “stiker_preview” and select a file with a weapon model, for example, P250 – “sticker_preview_pist_p250.mdl”.
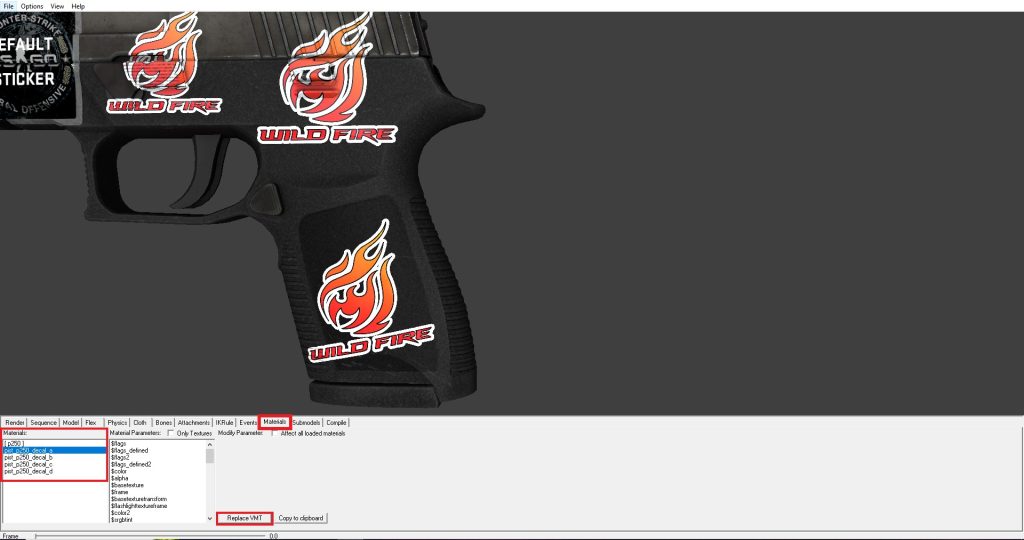
Next, in the menu below, select the “Materials” tab, select the decal you want to replace, and replace it with the previously created .vmt file.
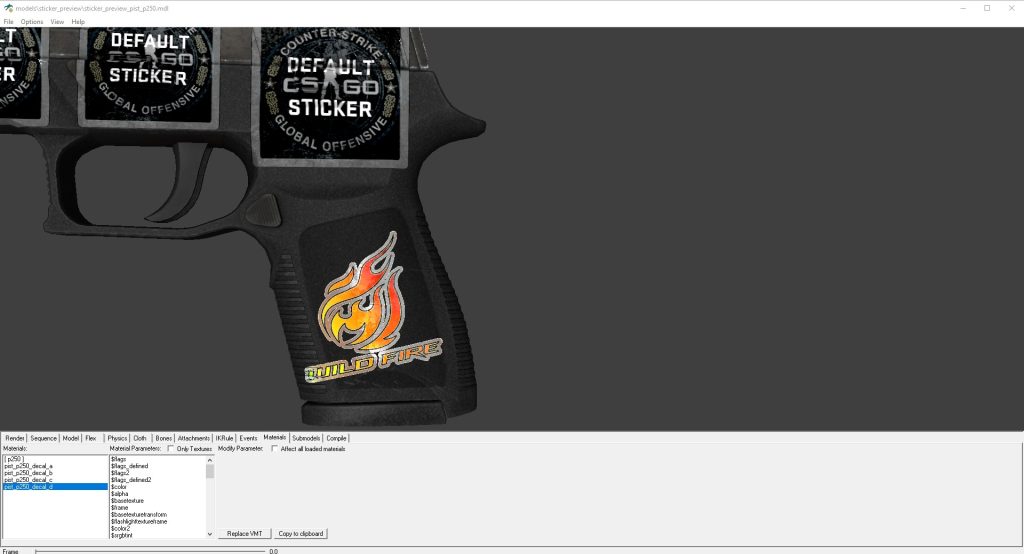
In the same way, we check whether everything is ok with a holographic sticker. If something is wrong, go back to the beginning and double-check everything. Maybe you made a mistake somewhere. The holographic sticker should look something like this:
Congratulations, you created your first sticker! Now you can admire the result and praise yourself. Now you can boldly publish your work in the Workshop.
How To Submit Your CS:GO Stickers To The Workshop
To publish your work in the Workshop, you need to run in CS:GO. Open the console and type in “workshop_publish”. If you do not know how to enable the developer console, we advise you to read our guide, where we describe this case in detail.
Let’s return to the publication. After you have entered the command into the console in the window that opens in the upper left corner, select “Sticker” and click “Add”.
Next, fill in all the fields and insert all the necessary files. In the VMT line, insert a file of the same format. In “Base Image Source”, paste the previously created “source.psd” file.

After, select VMT 2 and do the same for the holographic variant. The .psd file must be the same as in VMT 1. Just add your .tga file to the “Hologram Mask Source Image” and to the “Hologram Spectrum Source Image”.
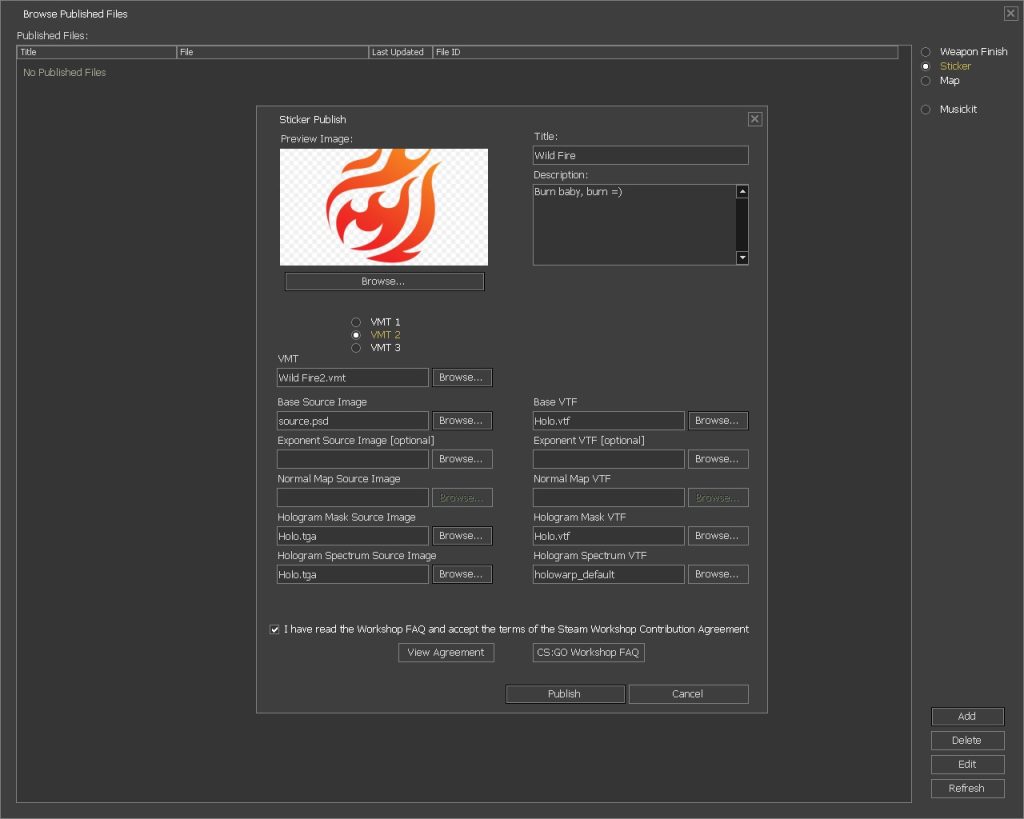
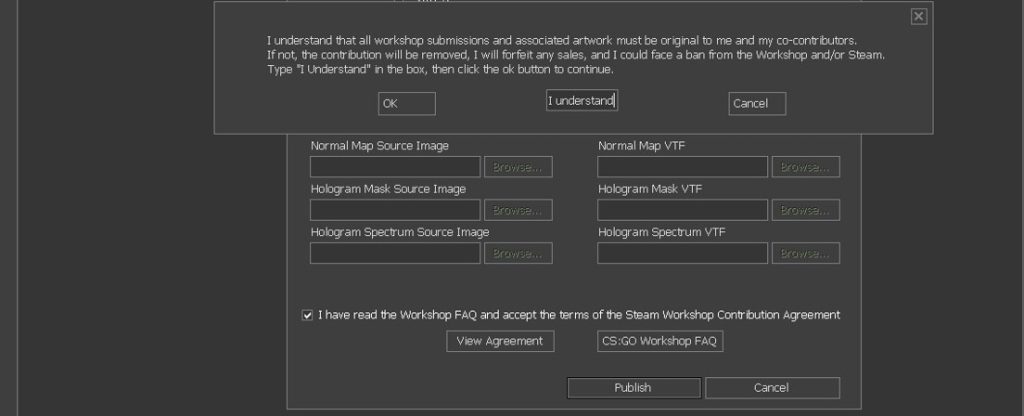
In the end, put a tick in the agreement with terms and click “Publish”. In the appeared window, you need to type “I understand” and click “OK”.
Congratulations, your work has been published! Now you can rightfully enter yourself into the community of content creators in CS:GO.
To Wrap Up!
Creating stickers is a very exciting process. Thousands of CS:GO players are engaged in this and similar activities. You can feel what interesting and complex work people do to create seemingly such a trifle as stickers. After all, anyone can become a content creator. The main thing is to be patient and take steps slowly with maximum accuracy.
If you enjoy creating in-game content, we advise you to read our article on creating maps in CS:GO. Perhaps it will be interesting for you because you can play on the maps you created. We also recommend visiting our blog , where we release new informative content for our users. Good luck!